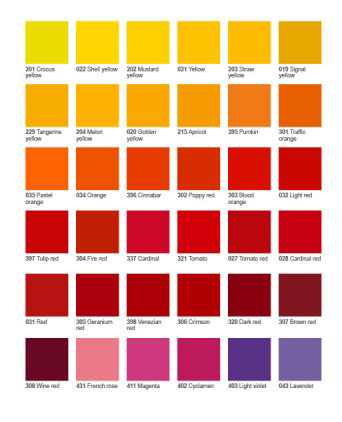
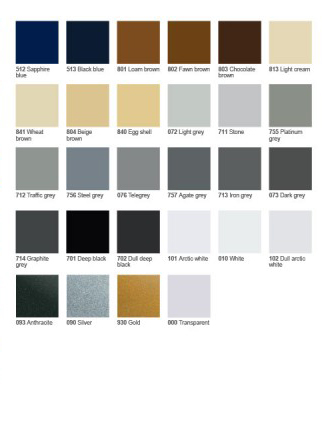
Vehicle graphics keeps promoting your business 24/7 We have sign-written over 7500 vans and other vehicles.

Why Choose Van Graphics

Van Graphics give you one of the most effective ways to promote your business on the move. When you apply bold visuals to your company car or fleet of vans, each vehicle becomes a mobile advertisement. As a result, your brand gains visibility every time you drive, stop, or park in public areas.

Van Graphics works well for almost every business. You can display your company name, logo, contact details, website, or even promotional messages. This information helps customers recognise your brand instantly. Because people notice vehicles more often on roads and in car parks, Van Graphics help you reach thousands of potential customers every week.

Impact Signs offers many graphics options to suit your branding goals. You can choose simple lettering, partial wraps, or full van wraps. Each style delivers a strong visual effect. Our materials remain weatherproof, durable, and easy to clean. They protect the vehicle surface and maintain their colour even in tough outdoor conditions. Moreover, you can select from a wide range of colours, textures, and finishes to match your brand style.

A branded vehicle graphics creates a smooth and professional appearance. It also promotes trust, especially when your team visits homes or commercial sites. Customers feel more confident when they see a clearly branded van arrive at their location.
Your van continues to advertise your business even when parked.

Although the van graphics stay secure and long-lasting, you can remove them later without damaging the paintwork. This makes van signage ideal for seasonal campaigns, rebranding, or updates to your services.

Experienced Designers and Installers

Impact Signs has created and installed more than 5,000 vehicle graphics for businesses across Aylesbury and the surrounding areas. Our team understands layout, readability, colour contrast, and placement. We design van graphics that look clear both up close and at a distance. We also install everything with precision, ensuring a smooth, bubble-free finish.

(inc. VAT)

Need help deciding?

Still unsure about what to order? No worries, we're happy to offer advice without any pressure. Simply choose how you would like to contact us - we'll guide you through your options.

Process

Impact Vans Process

Colour Swatch

This product is available in the following colours.

poracal vinyl swatches

Disclaimer: Although every effort has been made to display the colour swatches shown as true, all monitors are not consistant in colour representation, the swatches therefore should be taken only as a guide!

Example Prices

The following is intended as a guide only. It does not include artwork or re-drawing/editing/vectorising of customers artwork.

Small Vans

Basic

Vehicle Graphics
Typical Price: £102 - Basic layout – one colour, no logos/clipart and standard type face

Basic + Simple Logo

Vehicle Graphics
Typical Price: £160 - Basic + simple logo – up to 2 colours + simple logo and standard type faces

Complex + Simple Logo

Vehicle Graphics
Typical Price: £197 - Complex + simple logo – up to 2 colours + shadows or outline + simple logo and standard type faces

Complex + Colour Logo Print

Vehicle Graphics
Typical Price: £220 - Complex + colour logo – multi colours + shadows or outline + colour logo/print and standard type faces

Complex + Large Colour Logo

Vehicle Graphics
Typical Price: £297 - Complex + colour logo – multi colours + shadows or outline + colour logo/print and standard type faces

Medium Vans

Basic

Vehicle Graphics
Typical Price: £132 - Basic layout – one colour, no logos/clipart and standard type face

Basic + Simple Logo

Vehicle Graphics
Typical Price: £185 - Basic + simple logo – up to 2 colours + simple logo and standard type faces

Complex + Simple Logo

Vehicle Graphics
Typical Price: £230 - Complex + simple logo – up to 2 colours + shadows or outline + simple logo and standard type faces

Complex + Colour Logo Print

Vehicle Graphics
Typical Price: £270 - Complex + colour logo – multi colours + shadows or outline + colour logo/print and standard type faces

Complex + Large Colour Logo

Vehicle Graphics
Typical Price: £415 - Complex + colour logo – multi colours + shadows or outline + colour logo/print and standard type faces

Large Vans

Basic

Vehicle Graphics
Typical Price: £167 - Basic layout – one colour, no logos/clipart and standard type face

Basic + Simple Logo

Vehicle Graphics
Typical Price: £210 - Basic + simple logo – up to 2 colours + simple logo and standard type faces

Complex + Simple Logo

Vehicle Graphics
Typical Price: £275 - Complex + simple logo – up to 2 colours + shadows or outline + simple logo and standard type faces

Complex + Colour Logo Print

Vehicle Graphics
Typical Price: £425 - Complex + colour logo – multi colours + shadows or outline + colour logo/print and standard type faces

Complex + Large Colour Logo

Vehicle Graphics
Typical Price: £377 - Complex + colour logo – multi colours + shadows or outline + colour logo/print and standard type faces

Trucks

Basic

Vehicle Graphics
Typical Price: £102 - Basic layout – one colour, no logos/clipart and standard type face

Basic + Simple Logo

Vehicle Graphics
Typical Price: £160 - Basic + simple logo – up to 2 colours + simple logo and standard type faces

Complex + Simple Logo

Vehicle Graphics
Typical Price: £220 - Complex + simple logo – up to 2 colours + shadows or outline + simple logo and standard type faces

Complex + Colour Logo Print

Vehicle Graphics
Typical Price: £305 - Complex + colour logo – multi colours + shadows or outline + colour logo/print and standard type faces

D.I.Y

Kit Contents

  • Chinagraph pencil – for marking position of graphics. Easily removed without damaging surface.
  • Lint free cloth – for preparing the surface.
  • Block plan – Shows your vehicle and exactly where to position of graphics.
  • Instruction leaflet – All the information you need for a professional finish.
  • Application fluid (very important) – allows re-positioning of graphics. A ‘grease’ element allows
    you to slide graphics into position as well as making air bubble removal extremely easy. It is also quick drying to allow the job to be completed quickly. When fitted with application fluid, vinyl adheres just as well as if fitted dry. Drying time approx 30 minutes (90 minutes on glass).

Instructions for vinyl application

  • To start clean area thoroughly by spraying a little application fluid onto the surface, and wiping with lint free cloth.
  • Set out your base and margin lines using china graph pencil and ruler to mark the lines. To mark a base line measure down and mark panel (a small dot or dash), do this approx. every 12”. (fig 1)
  • Then using a straight edge join the marks to make a straight line (fig 2).
  • For final check of alignment place your taped vinyl graphic/text against your china graph markings for positioning is correct (fig 3).
  • Spray application fluid on to the surface until wet. The wetter the better! You cannot make the area too wet!
  • Note: if the text is to big or long to apply in one strip simply tear in between lettering (fig 4).
  • Carefully peel away taped vinyl graphic/text from paper backing exposing sticky side of vinyl onto the tape side (fig 5). Important, keep Sticky side dust and grit free, immediately applying your vinyl to surface, carefully sliding into position, keep the paper backing to be used later.
  • If you have torn the graphic into 2 parts as fig 4 fit first part (fig 6) first.
  • Important, do not remove tape from first part until second part is in place!
  • When in position lightly use the plastic squeegee pressing and spreading over vinyl working from the centre outwards to flatten and dispose of any bubbles and fluid (fig 7).
  • When fitting the next part (if applicable) simply butt join the tear (fig 8) and then use the plastic squeegee, as above.
  • Leave to dry for approximately 5 mins to 1 hour depending on temperature.
  • When dry before removing the tape from graphic/text, flatten again with plastic squeegee, then slowly peel off tape (fig 10). If vinyl comes away with the tape then it’s not quite dry, wait and try again later.
  • Finish by using the paper backing from the graphic/text supplied, shiny side up placing onto the applied vinyl pressing firmly with the plastic squeegee (fig 12) all over the graphic/text.
  • To remove china graph marks lightly dampen cloth with white spirit and rub gently.
  • That’ it, job done! (fig 13). You can now drive your vehicle as normal, but please avoid any kind of washing for 2 days.

Hints

  • Static attracts grit. Work in a dust/grit free area.
  • Air bubbles can be caused by the following:
    Surface not wet enough, be careful in direct sunlight as it dries fast!
    Not pressing hard enough with the squeegee
    Removing the application tape too soon after applying vinyl.
    If bubbles do occur, don’t panic, they will probably disappear in a few days. If not use a pin to prick them and then push the air out with the squeegee (or your fingers).

Maintenance & Tech

Care of your new vehicle livery

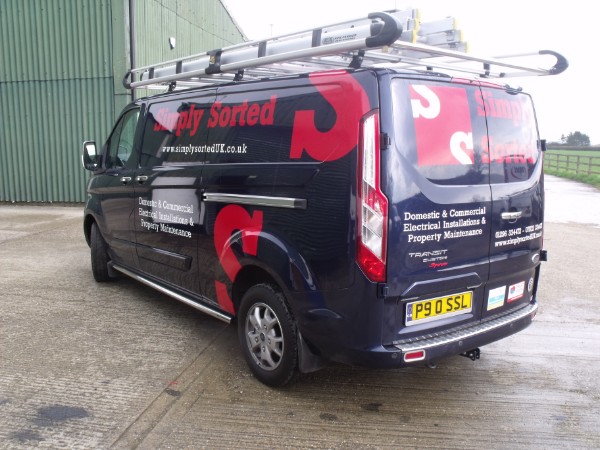
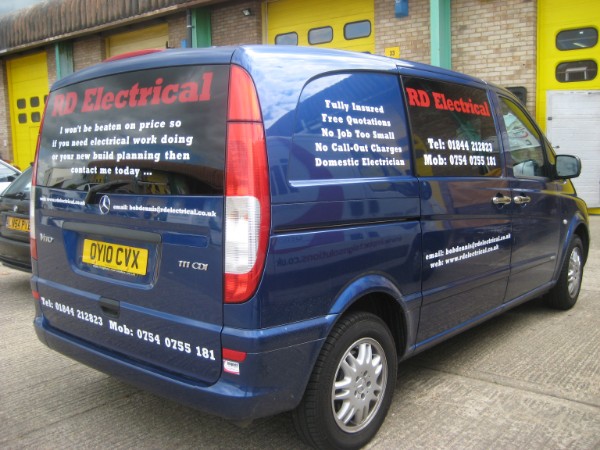
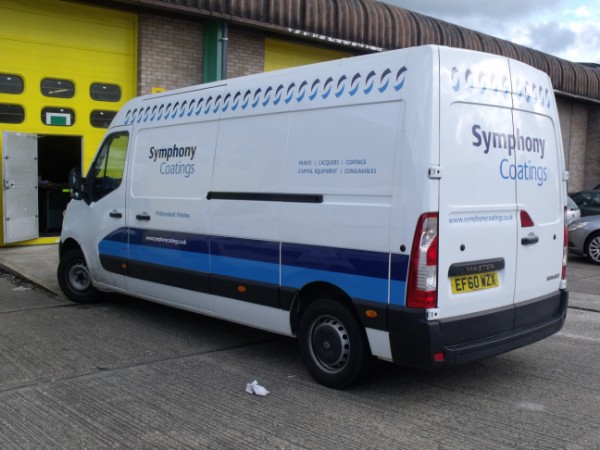
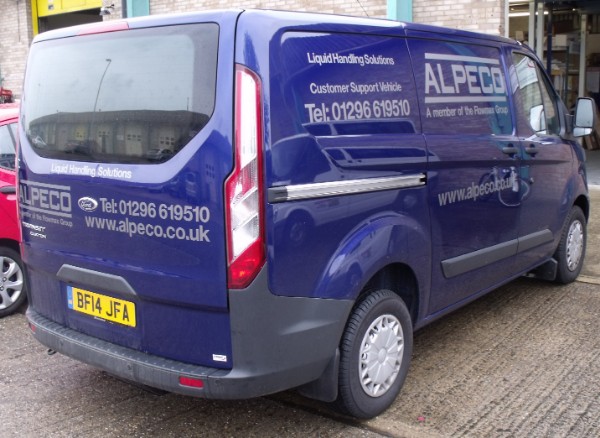
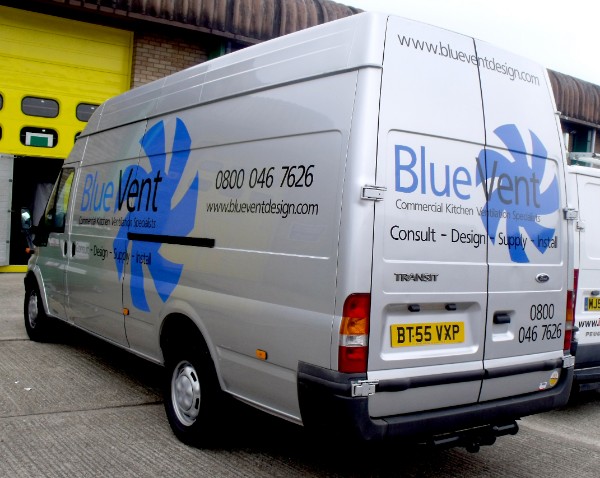
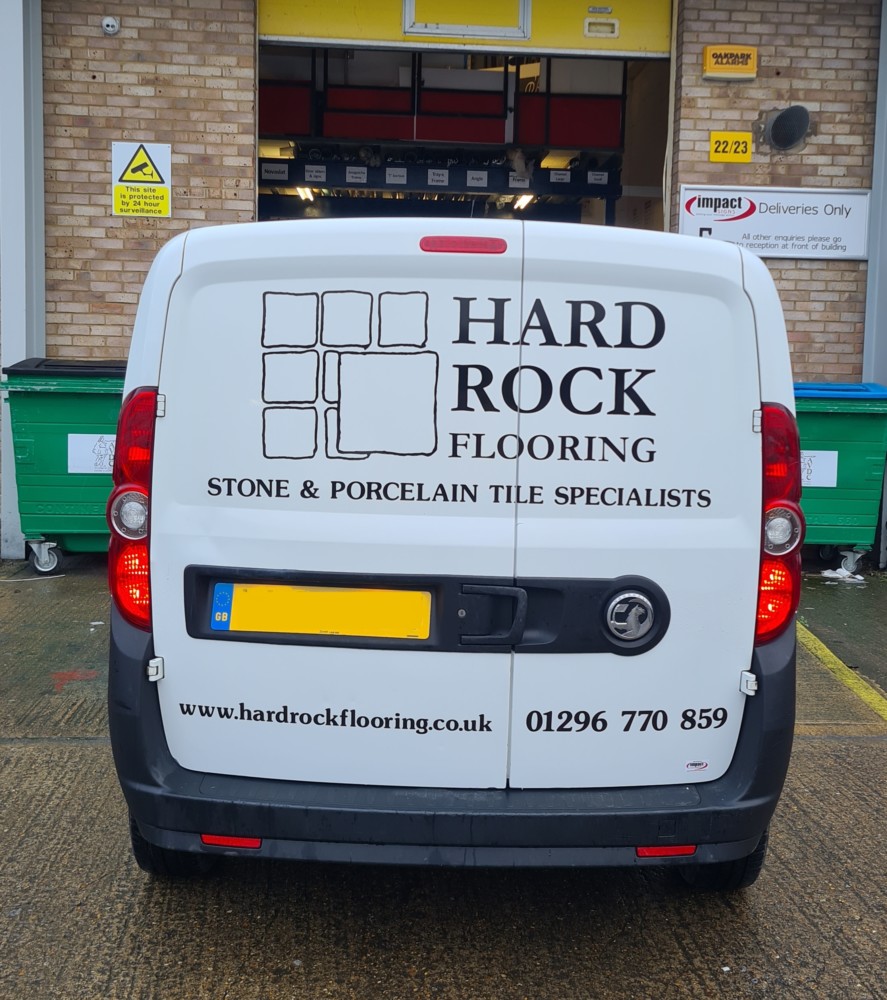
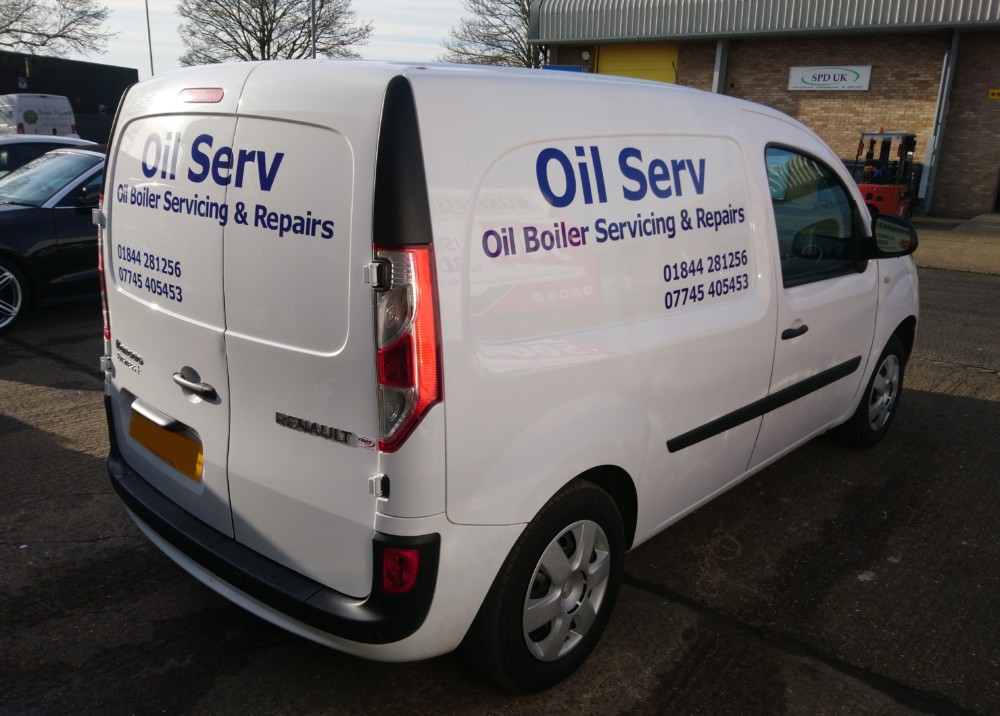
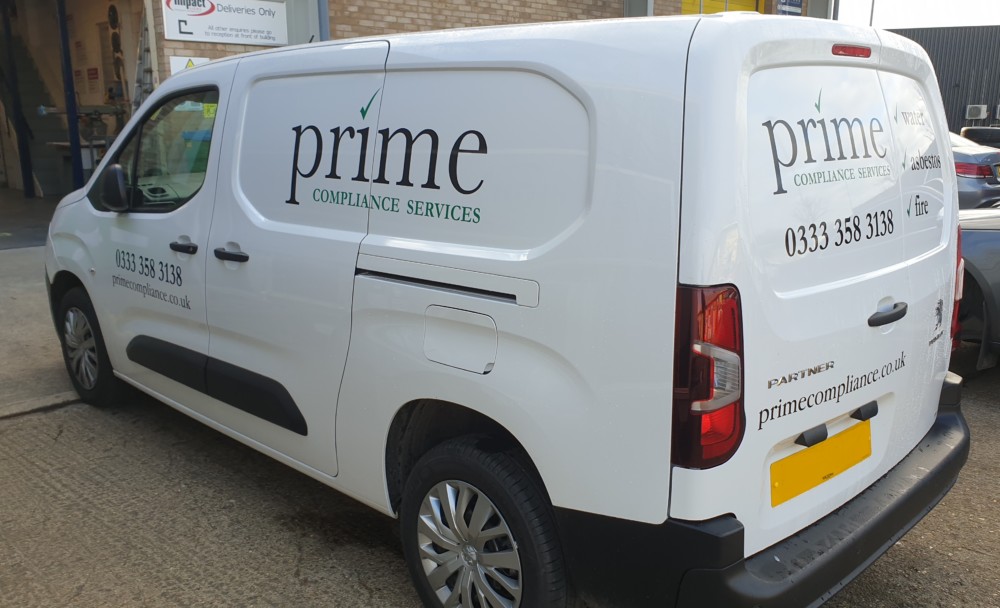
Congratulations, you have just bought ‘the best’. Impact Signs use ‘new generation’ vinyls for all of their vehicle liveries. The manufacturers stated exterior life under normal conditions is a massive 7 – 10 years (except florescent & some specialty finishes). Although you may not intend to keep your vehicle this long, you still benefit. Because of the high quality vinyl and adhesive, it means that your vehicle looks better from day one You may experience ‘air bubbles’ for up to 4 days after sign writing. In actual fact, these are not air but application fluid. All you have to do is…. Leave them alone, they will simply disappear of their own accord, this is in no way caused by poor workmanship and will not affect the long term adhesion of the vinyl Washing your vehicle is pretty much the same as it would be if it were not sign written, however a few precautions should be taken:
  • Do not wash for at least 4 days after your vehicle has been sign written. This allows the adhesive to ‘cure’ properly
  • Do not direct pressure washers ‘up close’ to the sign writing, especially if the text/graphic is very small or intricate.
  • If cleaning by hand, use a sponge, not a cloth.
  • If you have digitally printed (full colour or graduated) vinyl, do not use solvent of any kind. This may cause the image to fade. Soapy water is all you will need.
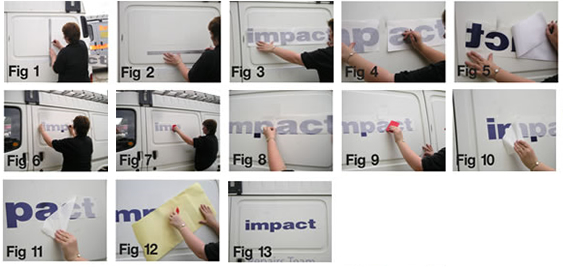
If you wish to remove the sign writing at any stage, this is relatively easy to do, just use the following guidelines:
  • Use heat! Vinyl can be removed easier when it is warm. A hair dryer is the best tool for the job. Caution! Do not use hot air guns, these may burn the paint and also it can be highly dangerous if used around the petrol cap!!!!
  • To remove the glue residue use white spirit. Let it soak in for approx 2 minutes first, glue should then be easy to use.
  • Do not use a knife to remove vinyl. It may ‘pierce’ the paint. Whereas this may not show at first it could begin to rust. Use a plastic knife or ask us for a squeegee
  • When the entire vinyl and glue residue is removed, it would be wise to use ‘T’ cut to hide the ‘ghosting’ that may be evident.

Impact signs do offer a vinyl removal service. It includes vinyl and adhesive residue removal and ‘T’ cutting. All vehicles must be delivered to and collected from our premises in Aylesbury.

Testimonials

Thank you very much for accommodating me on this project. I really wanted to go with you guys as the recommendation was a good one. The price is good too.

Alan MorrisThe Swim Shed

We have had some positive feedback on the Sprinter and even getting calls from people we know who have seen it on the road. That’s just what we want.

PaulSpruced Up
Click here to read impartial, anonymous reviews vetted by THE Trading Standards

Video

https://www.youtube.com/watch?v=F_cWIylpLT4 https://www.youtube.com/watch?v=5LkbGBISqNM https://www.youtube.com/watch?v=EshwMiJ2VEI

FAQ's

How do I care for my vehicle wrap?

Do's

  • Regularly wash your vehicle to remove dirt, debris, and contaminants that can damage the wrap. Use water with a mild soap (for difficult contaminants, use hot, soapy water) and a soft, clean cloth or sponge (do not use any cloths/brushes that have been used previously as this can transfer dirt/grit and cause damage). Always rinse thoroughly and care for your vehicle graphics as you would any fine paint finish.
  • Test specific cleaning products in an inconspicuous area before use. Isopropanol can be used to remove stubborn marks or adhesive.
  • Wipe off fuel spills immediately and hand wash the affected area with a soft cloth and mild soap to avoid vinyl degradation.
  • Remove salt from the wrap. Much like with paintwork, road salt can cause damage if allowed to build up over time. Ensure regular washing to avoid salt build up, especially during the winter months.
  • Inspect your vehicle regularly to check the wrap for signs of damage, lifting edges, or bubbles. If you should get a rip, cut or tear in your vinyl you should get it fixed as soon as possible to prevent further damage or peeling. New damages are more likely fixable if you get it looked at as soon as you notice it.

Don'ts

  • Do not wash your vehicle for the first week of it being wrapped.
  • Avoid high-pressure washers, steam cleaners or automatic car washes with rotating brushes to prevent lifting the edges of the film.
  • Avoid washing your car in direct sunlight, as it will dry out the soapy water too quickly and can leave ugly spots on your newly cleaned vehicle.
  • Do not use abrasive cleaners or tools, petroleum based, acidic or strong cleaning agents, caustic cleaners or Ketones such as Acetone or MEK.
  • Avoid using wax or sealants on the wrap as these can create a hazy or dull appearance which reduces the vibrancy of the wrap's colours. If you do want to wax your vehicle, make sure the products you use are free of distillate petroleum.
  • Do not place heavy objects against the wrap, as this can cause creases or damage.
  • Avoid parking under trees as this may damage the vinyl.

Helpful Tips

  • Avoid high temperatures and whenever possible, park the vehicle in shaded areas or in a garage to protect the wrap from excessive heat exposure. Prolonged exposure to high temperatures can cause deterioration to wrapping.
  • Alternate the position of the vehicle when parking to prevent one side from fading faster than the other.
  • If the wrap turns brown, it is due to prolonged exposure to acid from pollutants in the air and may indicate neglect or failure to follow proper cleaning procedures. The affected area may need to be rewrapped. If you notice brown, discoloured, or rust-coloured areas on your wrap, it is best to remove the film from your vehicle to prevent damage to the paint beneath it and reapply fresh wrap. Often, it is only necessary to replace the affected panel.
  • Be mindful of objects or surfaces that could scratch or scrape the vehicle wrap. When loading or unloading items from your vehicle, use caution to prevent any accidental damage.
By following these care tips, you can keep your vehicle wrap looking vibrant and protect it for an extended period. A well-maintained wrap can last for several years, making it a cost-effective and attractive option for vehicle customisation and advertising.

Why do I need van graphics?

Van Graphics Information

Van graphics are primarily used for business promotion, turning your vehicle into a mobile advertisement. They build brand awareness, present a professional image, and attract attention whether your van is driving, parked, or on-site. For many businesses, it’s a cost-effective and high-visibility marketing tool.

Are van graphics permanent?

Van Graphics Temporary vs Permanent Options

No – professionally installed van graphics are designed to be durable but removable. When applied and removed correctly, they won’t damage your paintwork. This makes them ideal for leased vehicles or when you need to update branding in future.

Can I have just text or full images?

Van Graphics Information

Yes – we offer everything from basic die cut lettering to full-colour printed panels or wraps.

Will the design fit my van type?

Van Graphics Customisation and Branding

Yes – we have templates for all major makes and models to ensure a perfect fit.

How long do van graphics last?

Van Graphics Durability and Weather Resistance

High-quality vinyl graphics typically last 5–7 years, though they can exceed this with proper care. Factors like sun exposure, frequent washing, and road salt can affect longevity, so maintenance plays a key role in lifespan.

How do I care for my van graphics?

Van Graphics Information

Wash your van regularly using a soft sponge or cloth and a mild, non-abrasive car shampoo. Avoid high-pressure washers near the edges of the vinyl, and never use solvent-based cleaners or abrasive pads. To extend the life of the graphics, park in the shade where possible and avoid automatic car washes with stiff brushes.